Many parents want their children to get a good balance workout during childhood, but lack the tools and skills to do so. Children’s balance bikes are a great option and this article will teach your child how to ride a balance bike.
Balance bikes can be played with by babies very early on, starting at 18 months. This exercise focuses on training for the baby’s sense of balance and body coordination. The same, of course, is good for leg muscle development.
Before riding, warm up well to avoid discomfort during the ride and be well prepared! Below we share tips for riding a child’s balance bike!
Get One-Stop Solution from This Page
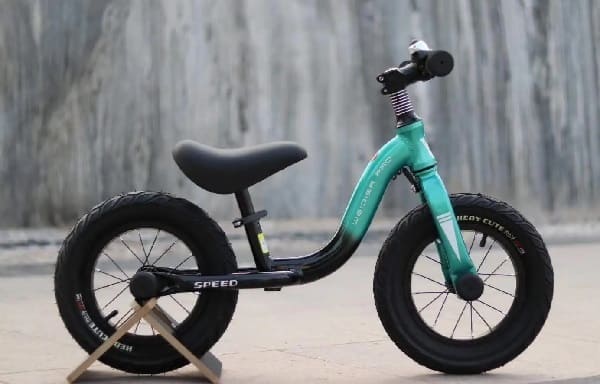
What is a Balance Bike?
Balance bikes for children are a popular sport for young children in Europe and the USA. It is also affectionately known as my firstbike.
It is designed mainly for toddlers to exercise their balancing ability and babies need to use their feet to continuously pedal the ground to provide gliding power. The new concept of a simple version of the children’s bike without pedals, brakes and auxiliary wheels.
What You Need to do Before Riding a Balance Bike
Bring protective gear
Before learning to ride a balance bike check that you have all the protective gear such as helmet, knee pads, wrist guards etc. These are all things that can give protection in case your baby falls.
Adjust the seat height
The seat needs to be adjusted to your child’s actual height so that he or she can get the hang of it as soon as possible. The general rule is that it is best for your child to sit on the seat with their feet half on the ground, while smaller children can sit with all their feet on the ground.
How to Ride a Balance Bike?
In order to teach your child how to ride a balance bike, we have compiled a list of riding skills that your child needs to master, divided into 3 stages: beginner, intermediate and advanced.
Beginner
Suitable for children who are new to children’s balance bikes, or younger children who are not yet proficient in controlling them. It is best to choose a flat surface that is safe and reliable. The main purpose of this stage is to develop children’s hobby of riding and make them feel that riding a balance bike is a special fun thing to do.
The key elements to master at this stage are: sitting, pedalling and gripping
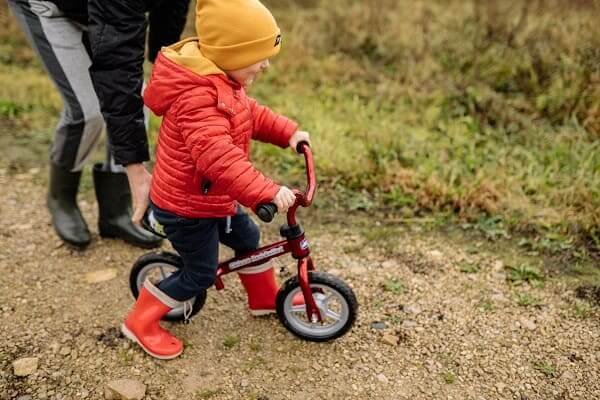
- Sitting: Adjust the cushion height to a slight bend in the knees; a suitable cushion height will help your child to be more comfortable during the ride. Lean your body downwards and press your body about 4 inches from the handlebars.
- Pedalling: When seated on the bike, spread the legs apart, one foot in front and one foot behind, with the front foot all the way to the ground and the heel of the back foot raised in a ready-to-start backward pedalling position.
- Grip: Place your arms perpendicular to the handlebars at handlebar level; palms forward for easy power generation during the ride.
Head up and forward, ready to go. During the ride, hold the handlebars with your head up and look ahead, lean your body forward and down, alternate between your feet and pedal backwards and left, while keeping your body balanced.
Intermediate
When children have mastered free riding and have some experience of riding a balance bike, simple obstacles such as figure of 8 cones, small arches and speed bumps can be set up on a flat surface to improve concentration and increase children’s interest with a little challenge.
The key points to master at this stage: turn, punch and collect
- Turn: Hold the handlebars with both hands and practice turning according to the set figure 8 route, adjusting the left and right weight of the body when turning: left turn with the left foot on the ground and the left leg as the weight, right turn with the right foot on the ground and the right leg as the weight.
- Sprint: Slide both feet in the same direction or alternately to speed up the ride, and you can sprint through obstacles such as arch bridges and buffer strips.
- Retract: When riding at a certain speed, lift both feet onto the footrests of the frame and control the bike in a free glide around obstacles through S-curves or bumpy roads.
Advanced
When the child has mastered the bike and has the willingness and ability to improve their skills, they are ready to try more difficult rides. This is a difficult stage for children and protection is essential.
At this stage of training, surfaces with large undulating continuous steep slopes and complex obstacles (rolled surfaces, gravel surfaces, dirt slope surfaces, short steps, etc.) should be chosen. The venue is more demanding and particularly difficult than the beginner and intermediate levels, but it is an excellent exercise for the child’s riding ability and mental toughness as well as self-confidence.
At this stage, the children master 3 key points: stand, jump and turn
- Stand: try standing on one or both feet on the basis of the ‘tuck’, while taking control of the direction around or through obstacles.
- Jumping: first after a period of steep sprinting and falling, strengthening the child’s leg muscles and sense of balance while also developing courage and will, then choose a platform with a height difference to practice jumping: lean forward when jumping, hold the handlebars tightly to keep parallel to the body, sit back to control the balance, bend the legs to the ground.
- Turn: stop drift turn, jump turn.
Complete more difficult poses such as airborne handlebar jumps while doing a tuck, stand and jump.
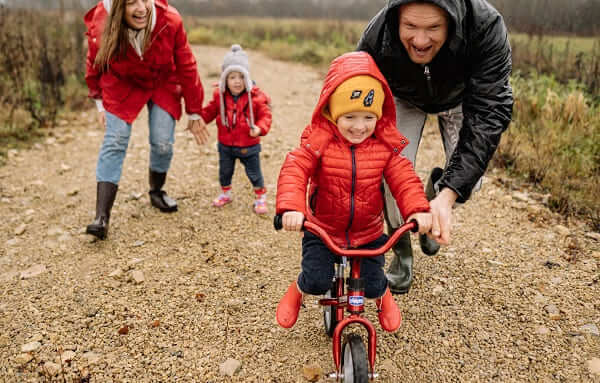
A special reminder is that children should always wear helmets and knee pads to protect themselves during the practice of children’s balance bikes. Mothers and fathers should also accompany their children throughout the whole process and take them on rides step by step. It is important to lay a good foundation, as a solid foundation will lead to a rapid improvement later on.
How to Choose a Quality Balance Bike?
1. Applicable age group
2-6 years old is the fastest time for babies to grow, so when buying a child balance bike try to choose one that is suitable for 2-6 year olds. Look for a balance bike with an adjustable seat height, which can be adjusted according to your baby’s height.
2. Body weight
The lighter the body the better in terms of meeting load-bearing standards. A bike that is too heavy can lead to crushing injuries when your baby accidentally falls during the ride, as babies are weak and an overly heavy bike can lead to your baby not being able to hold it up.
3. Body material
It is recommended that mothers select a balance bike with a body made of magnesium alloy, carbon fiber and nylon fiberglass. Magnesium alloy light weight, good load-bearing, corrosion resistance; carbon fiber strength, light weight, nylon fiberglass high strength, heat resistance, etc. has good stability.
4. Tyres
When choosing a balance bike, it is recommended to choose rubber pneumatic tyres.
EVA foam wheels have the advantage of not needing to be inflated and are inexpensive, but the disadvantage is the lack of grip, easy to wear, and easy to slip. Rubber pneumatic tyres are flexible, shock absorbent and have a good grip.
Conclusion
My baby rides a Retrospec Cricket balance bike. The seat is adjustable from 8 to 16 inches and can be ridden by children aged 1 to 6.
The aerodynamic design of this bike allows it to be used for everyday riding as well as racing, so you can use it for two purposes and save yourself the trouble of changing bikes.
A great performing balance bike is the key to teaching your child to ride a balance bike. All the best to you!